The Brewing Process
As you may or may not already know, the process of brewing beer can become quite extensive. There is a general set of guidelines that every home-brewer should abide by, and this will be our first topic of discussion. Beyond this general process lies a plethora of variations and several personal opinions that makes each beer unique. We will review a few different processes to get a glimpse at the broad spectrum of possibilities.
General Process
After you have acquired the necessary equipment and ingredients to brew a particular style of beer, there is a general scheme to the process of brewing.
- Sanitize
- Steep Grains
- Start Boil
- Follow Schedule for Hops
- Cool Wort & Transfer
- Pitch Yeast
- Ferment
- Bottle
Key Factors
There are a few things to keep in mind that are crucial to brewing an enjoyable beer.
- Sanitation! The biggest contributor to brewing a successful beer is sanitation. Improper sanitation will result in off flavors. However, keep in mind that the bacteria that grow in the process of brewing beer will not make you sick.
- Stay on schedule. Timing is very important throughout the entire process of brewing. The key is to be attentive, but not impatient.
- Temperature control. Maintaining the proper temperature is a relevant factor in the brewing process, from start to finish.
- Cooling. Aside from sanitation, the rate at which wort is cooled is the "make it or break it" point in the brewing process. Temperatures above 140F will kill bacteria and wild yeasts, but cooling too slowly will cause oxidation and produce dimethyl sulfide, which results in off flavors.


|
Sanitation
Before and after use, equipment should be thoroughly cleaned. This is most effectively accomplished by soaking equipment using a solution of powdered brewery wash (pictured left) and water. This can be purchased for around $6.99 at most brewing supply stores. Even when equipment and bottles appear to be clean, it is still necessary to sanitize everything prior to use. Potassium metabisulfite (pictured left) is a commonly used cleanser in both home-brewing and commercial brewing. It is available at St. Louis Wine and Beermaking for $5.15. |
Steep Grains

Mash tun

Inside mash tun

Sparge Arm
|
The first step in the general process of brewing is the act of combining water and grains (malted barley) to create what is called wort, which is comprised of sugars pulled from the malt. It is important to use clean tap water to avoid contaminants. This process is the most commonly used method, although some home-brewers prefer the all extract method which does not require steeping grains. Refer to the Methods section for more information on all extract brewing.
When steeping grains, wort is created using either a mash tun, for all grain brewing, or a mesh sock, for a method of combining grain and malt extract. When using a combination method, grain is placed into a mesh sock and steeped for 20-30 minutes to extract fermentable sugars and add flavor prior to adding malt extract and boiling. The more perfered, yet more challenging all grain method, uses a mash tun and sparge arm to extract fermentable sugars. This method requires a large grain bill, usually 12-18 pounds for a 5-6 gallon batch. There are two ways to mash when brewing with the all grain method, which are single infusion mashing and decoction or step mashing. Single infusion mashing requires one temperature for mash in and sparging. Decoction mashing requires the brewer to pull a volume of wort from the mash tun and heat it in a seperate kettle. This wort is then added back into the mash tun, thus raising the temperature. This is done two to three times, raising the temperature in incremental steps, hence the name step mashing. Benefits of decoction mashing are maximal flavor, additional fermentable sugars (enzymes), and better clarity. A helpful and necessary tool to use when steeping grains this way is a mash and sparge water calculator. You can find this, free of charge, on a website called brew365.com. This calculator will provide the necessary amount and temperature of mash and sparge water, depending on a few different variables. These variables are the batch size, grain bill, boil time, mash thickness, and target mash temperature. The calculator will provide the striking temperature and sparge temperature, as well as the amounts of water needed for both. Striking temperature is the temperature needed to maintain the necessary target mash temperature, as you will seal the lid onto the mash tun during mashing. After 60-90 minutes of steeping, the mash is ready to be transferred into the brew kettle. |
Transfer to Brew Kettle
|
First, incrementally drain wort from the spigot at the bottom of the mash tun and pour it back in over the top of the grain bed. Continue doing this until the wort starts to appear clear. Then, attempt to drain wort from the mash tun into the brew kettle while sparging water over the grain at the same fluid rate. Do this until the proper boiling volume is reached. It is easiest to transfer wort from the mash tun using gravity. However, there are other options that implement an electric pump.

|

15 gallon kettle with thermometer, filter and spigot
|
Boil Wort
|
Once the wort is transferred to the brew kettle it is time to begin boiling. When using a combination method you must first bring the wort to a rolling boil (around 220 F) before adding dry and/or liquid malt extract. Boil time is typically 60-90 minutes depending on the preference of the brewer and the style of beer being brewed. Always make sure to stir the brew often and watch for boil-overs. During the boil, multiple varieties of leaf or pellet hops are added to the wort. Bittering hops are added within the first 15 minutes of the boil and aroma hops are added within the last 15 minutes of the boil. This is a general guideline for the addition of hops, but the variations of the process of adding this ingredient are endless. Hops add flavor and scent to the brew and are used to describe the flavor of beer on the IBU scale.
|

|
Cool & Transfer

Wort Chiller

Plate Chiller

|
At the end of the boil it is now time to chill the wort to a temperature that is suitable for the particular yeast being used. Brewer's yeast is a strain of fungi that essentially eats the fermentable sugars and converts them into carbon-dioxide and alcohol. Wort above 70 degrees Fahrenheit will kill the yeast so it is important to chill your wort below that temperature before pitching the yeast. The key is to chill your wort as quickly as possible to avoid oxidation and the production of dimethyl sulfide, which results in off flavors.
There are three methods to chill wort.
|
Pitch Yeast & Ferment
|
After the wort has been chilled it is now time to transfer the wort into a primary fermenting vessel. This can be done using a siphon or a pump. However, using a plate chiller will cool and transfer wort at the same time. Once transferred, aerate and add the yeast. It is important to chill your wort to the specific temperature that the yeast you are using will thrive. Typically this is around 50 degrees Fahrenheit for lagers and about 65 degrees Fahrenheit for ales. Most yeast companies will state this temperature somewhere on the package. It is also important to take an Origin Gravity reading at this stage of the process. This will help to calculate the alcohol content or ABV (alcohol by volume) of the completed beer after fermentation and conditioning. To take this reading you will need a test jar and a hydrometer. Refer to the Beer Styles section for more information on gravity readings. Fermentation should occur in a dark area at a constant temperature. This process can take 4-12 weeks, depending on the style of beer. Ales can remain at the same temperature throughout fermentation and conditioning, but lagers most commonly go through a process of lagering where temperature is consistently dropped from room temperature to roughly 38 degrees Fahrenheit over a course of about four weeks. During fermentation, some brewers like to add additional hops to the brew which is called dry-hopping. To refine the taste and color of your beer, it is best to transfer it to a secondary fermenting vessel when fermentation is slowing but not yet complete. Most brewers use a glass carboy for secondary fermentation, but your beer must be transferred to a bottling bucket at some point before bottling.
|

Auto-siphon

Floating Thermometer (top) Hydrometer (bottom)

|
Bottle & Condition

Bottle Capper & Bottle Caps

Final Gravity Reading
|
When the fermentation process is over the wort is now technically beer and is ready to be bottled and conditioned. However, some more experienced brewers prefer to transfer their beer into a keg rather than bottling.
This is also a good time to take a Final Gravity reading to calculate the ABV of the finished brew. If transferring into bottles, it is necessary to dissolve corn sugar into the fermenting vessel right before bottling. To do this, you will have to boil 2 cups of water with 5 ounces of corn sugar for a five gallon batch. This will dissolve and sterilize the solution. This solution must be cooled before mixing it into the beer in the fermenting vessel. When corn sugar is added it causes carbonation while the beer conditions inside of dark glass bottles. Conditioning refines the flavors and coloring of beer, and can be done at room temperature regardless if a lager or ale. To bottle, you must use a bottling wand and tubing which is attached to the spigot of the bottling bucket. Pressing down on the end of the wand will allow beer to flow from the bottling bucket, through the tubing and into bottles. Leave approximately one inch of head space for carbonation gases when filling. Use a bottle capper to seal your bottles for conditioning. |
Kegging
|
An alternative to bottling is transferring your beer into a home kegerator system to age and carbonate. This system is commonly comprised of a 5 gallon keg, 5 pound CO2 tank, double gauge regulator, gas and beer line assemblies, and a small refrigerator. The term kegerator comes from the words "keg" and "refrigerator", combing the two to create a single device for serving draft beer. This also keeps the beer cold and fresh. The cost for a kegerator system is somewhat of an investment, as prices range from $250-$1,400 depending on the extent of it's features. Some home brewers will simply buy a kegging system and a small refrigerator separately. This is the most cost efficient way, compared to other systems that have a draft tower built into the top of the refrigerator. St. Louis Wine and Beermaking sells keg systems for $229.99-$289.99 and an adequate refrigerator can be bought for less than $200. To fill the keg, simply siphon beer from your fermenter to the keg and properly seal the lid. Attach the double gauge regulator between the CO2 tank and the keg to convert the high pressure of the CO2 gas (800-1000 psi) to the proper draft pressure (8-15 psi) to dispense beer.
|

(Photo by: Joshua West)
|
Enjoy!
After 2-4 weeks of conditioning it is now time to taste the fruits of your labor. Beer is best served in the upper 50 degree Fahrenheit range and in a pint class in order to get the full effects of color, aroma, and taste.

Maibock
|

Irish Stout
|
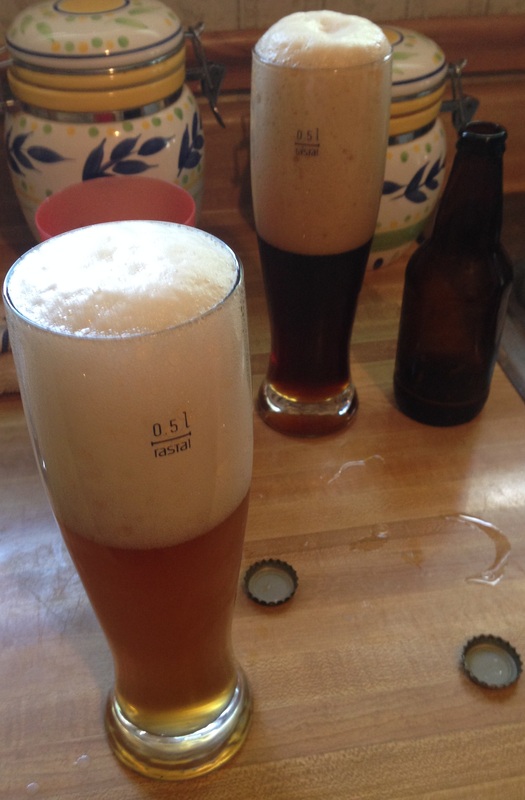
American IPA (left) European Bock (right)
|
*All photos by: Brendan Zoll
We do not endorse any particular company or brand.
We do not endorse any particular company or brand.
